
a messing-about primer to get you started
© 2021 Gary S. Stager, Ph.D.
NeoPixels are tiny, programmable, color-changing, LEDs manufactured by AdaFruit. NeoPixels make cool additions to micro:bit projects since they require little power, can be addressed individually or in groups, and can change color. They are especially popular in wearable projects and for creating interactive eTextiles.
Best of all, there are NeoPixels extension blocks available in Microsoft MakeCode. Although MakeCode makes programming the micro:bit easy, there is too little documentation about how to control the NeoPixels.
The WS2812 Integrated Light Source — or NeoPixel in Adafruit parlance — is the latest advance in the quest for a simple, scalable and affordable full-color LED. Red, green and blue LEDs are integrated alongside a driver chip into a tiny surface-mount package controlled through a single wire. They can be used individually, chained into longer strings or assembled into still more interesting form-factors.[1]


Popular NeoPixel accessory links
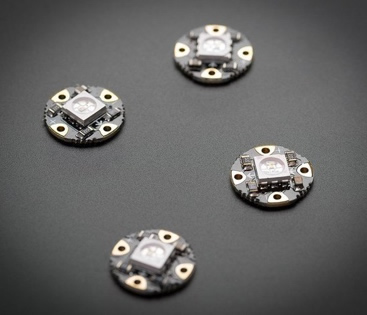
- Sewable NeoPixels
- NeoPixel Stick
- NeoPixel Ring
- NeoPixel Jewel
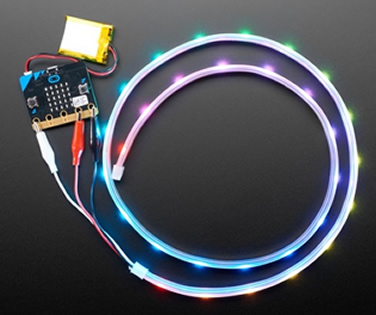
- NeoPixel LED strip with alligator clips for easy connection to the micro:bit – personal favorite
- bit:booster
Connecting the NeoPixels to the micro:bit
Unless the NeoPixels are integrated into a board like the bit:booster, you will need to connect three wires to P0, P1, or P2, plus 3V and GND. The NeoPixel strips with alligator clips from Adafruit are super easy to connect because there are alligator clips already attached. Otherwise, you can figure out how to connect three wires to the micro:bit.
Adding the NeoPixel extensions to MakeCode
- Go to https://makecode.microbit.org/
- Click Advanced – Extensions
- Type Neopixel or click on the button for the NeoPixel extensions (if it appears on your screen)
There should now be a new set of NeoPixel blocks in the MakeCode toolbox. These blocks will save with your project, but you will need to add them again for other projects.
Programming the NeoPixels
Once the NeoPixel extensions are installed, you may begin programming them with blocks specifically designed to control the LEDs. The first thing you need to do is tell MakeCode about your attached NeoPixel. This is initializing the environment (setting it up).
- Count the number of LEDs in your NeoPixel gizmo.
- Create an on start block.
- Insert a set strip to NeoPixel at pin… block.
- Change the pin popup to indicate which pin you connected the NeoPixels to.
- Change the number in the with ___ leds field to the number of LEDs in your NeoPixels.
- Leave the RGB format popup as it is unless you are using a NeoPixel that contains white LEDs.

Now, MakeCode will initialize the NeoPixel device whenever the program runs.
Note: If you connect more than one NeoPixel, MakeCode will automatically generate set blocks like the one above, but will name them strip2, strip3, etc… You also have the ability to rename the strips.
You might also wish to put some indication that a new program is downloaded to the micro:bit. I like to display an icon in the on start block. When troubleshooting, I change the icon.
Add some button control
- Create the following program, predict what it will do, and download it to the micro:bit.
- Press the A or B button and see what happens.

You can make a rainbow
Show rainbow from 1 to 360 lights each pixel with a different color of the rainbow.
- Try this program
Remember to specify how many LEDs are in your NeoPixel device.
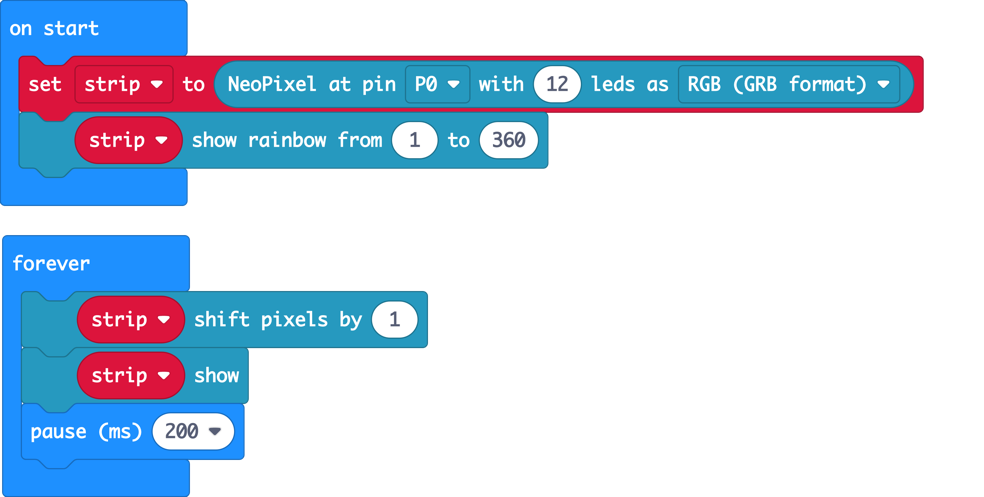
- What does the program do?
- What happens if you shift pixels by another number?
- Try to shift pixels by -1. What happens?
When you ask the NeoPixels to do something specific, like shift, rotate, or light a range of LEDs, you need to force the technology to show the strip with the strip show block in order to make the changes visible.
A slight variation to try
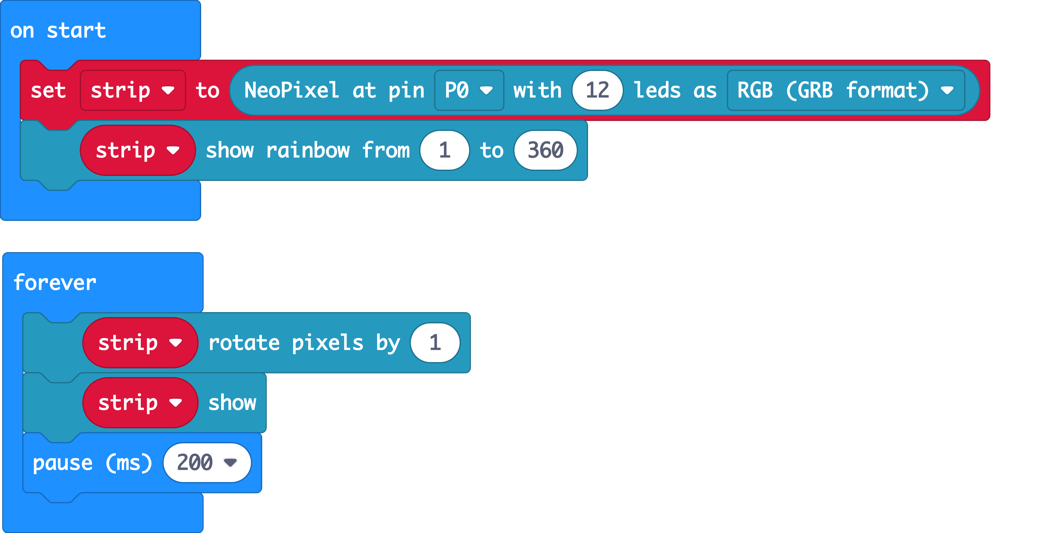
- How is rotating pixels different from shifting them?
- Try different values for rotating pixels. What happens?
- Try rotating pixels by half of the number of pixels you have. What happens?
- What happens if you reduce the number 360 in the show rainbow from 1 to 360 block in on start?
Do the twist
In this next program, we use the acceleration value (found in the Input tools) to send the pixels in one direction or the opposite when the micro:bit is tilted left or right.
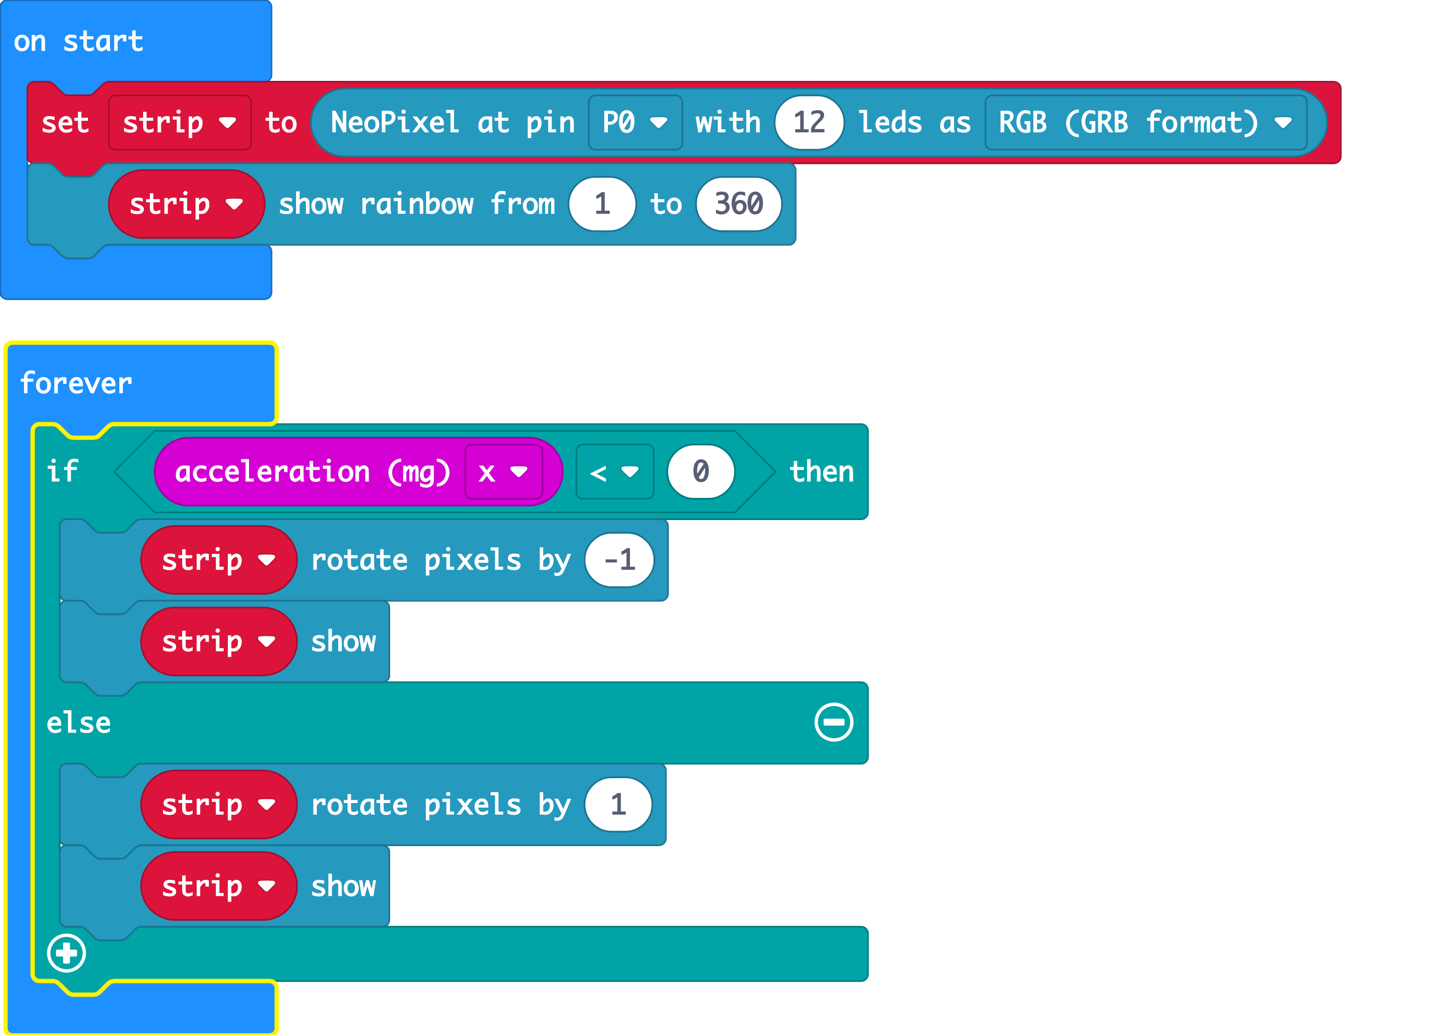
- Create the program above
- Download it to the micro:bit
- Tilt the micro:bit left or right
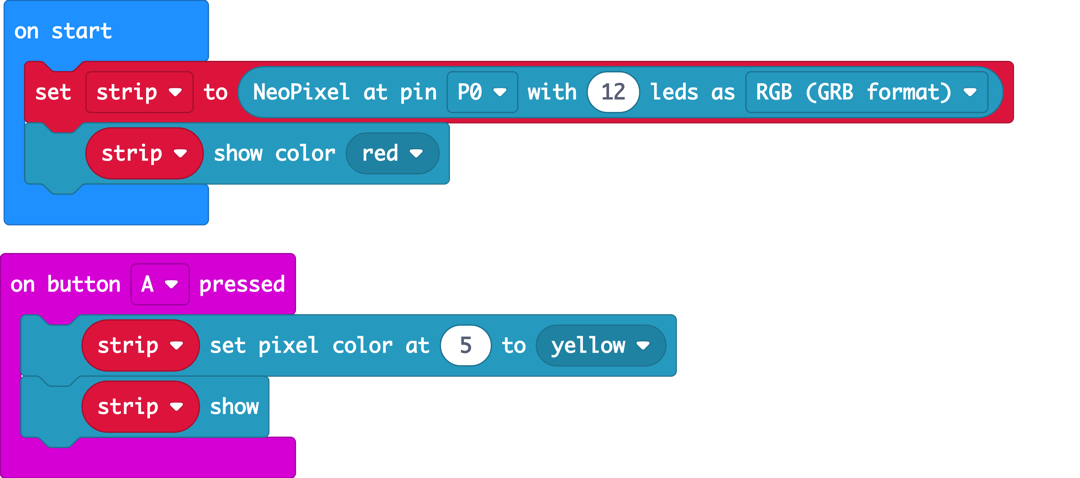
Be specific
You may use the set pixel color at block (found in the … section of the NeoPixel blocks in the toolbox). This block allows you to specify the color of a specific pixel. Remember to use the show block to display the changes.
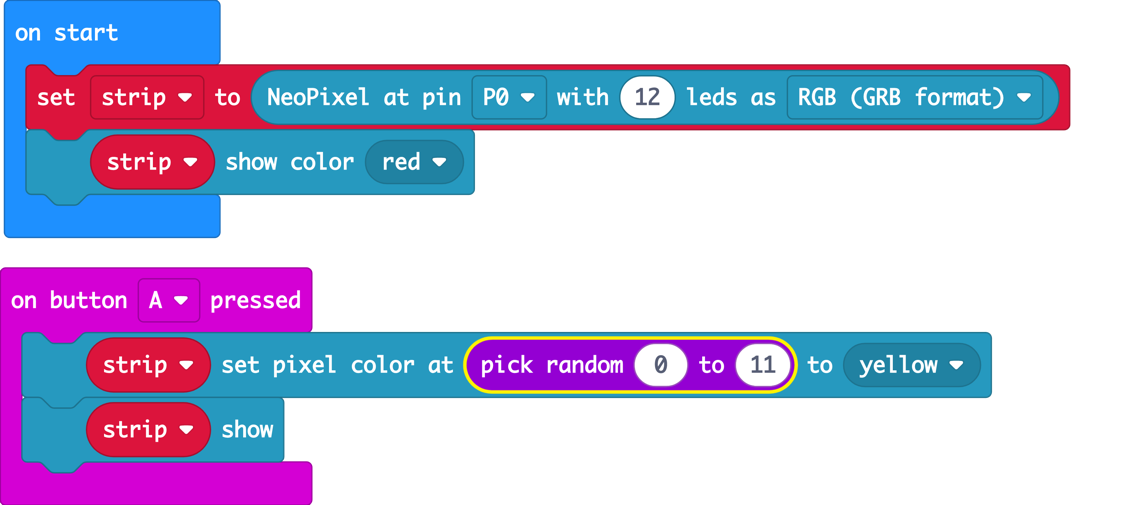
So random
- Make the following modification to the program above.
- After you insert the pick random variable and use the range 0 to your number of pixels – 1.
- Download the program to the micro:bit.
- Press button A repeatedly.
Ho! Ho! Ho!
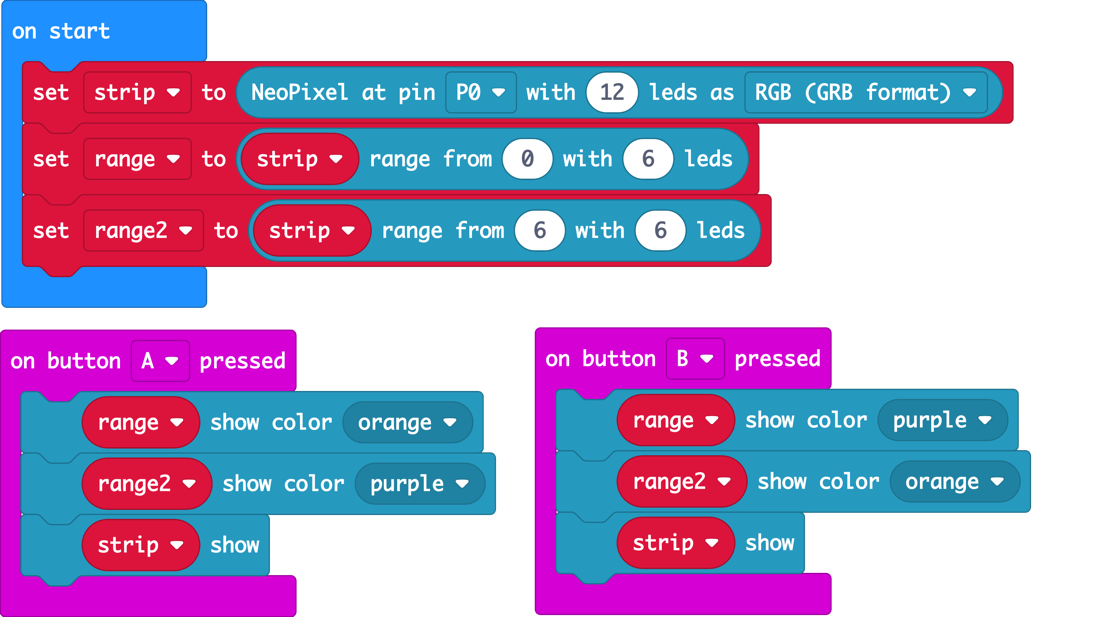
Imagine a 12 light NeoPixel ring. The following program turns it into a push button wreath.
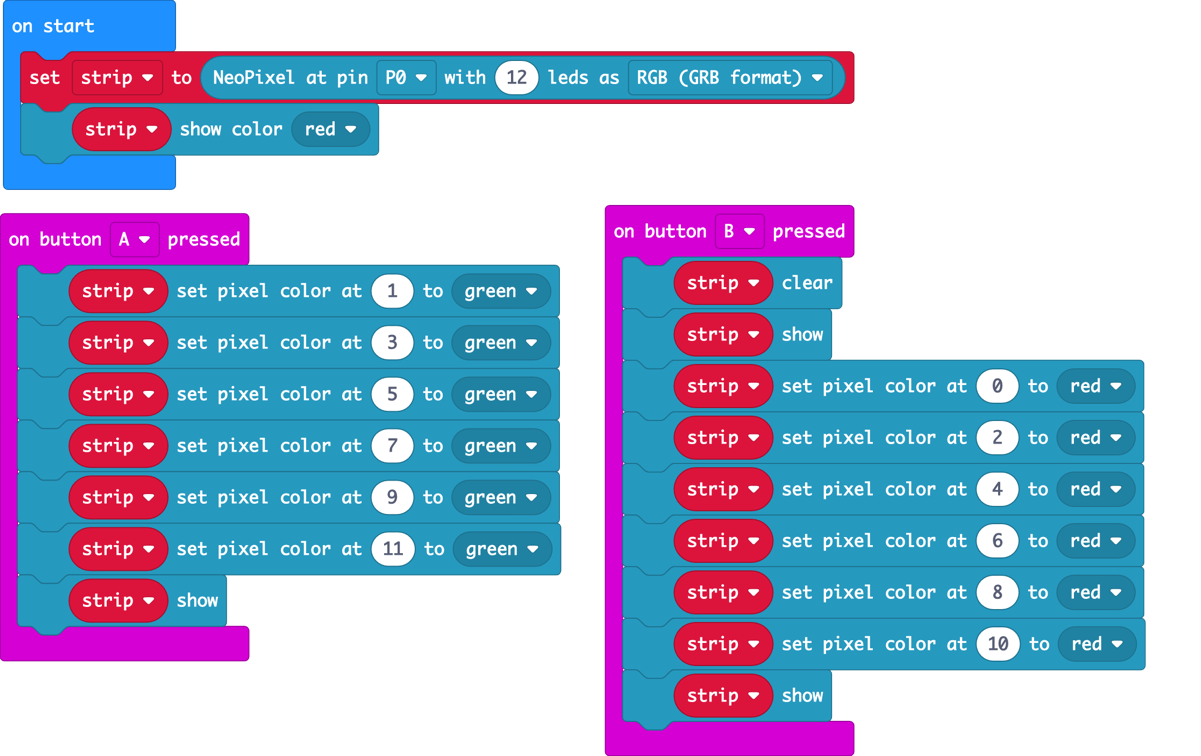
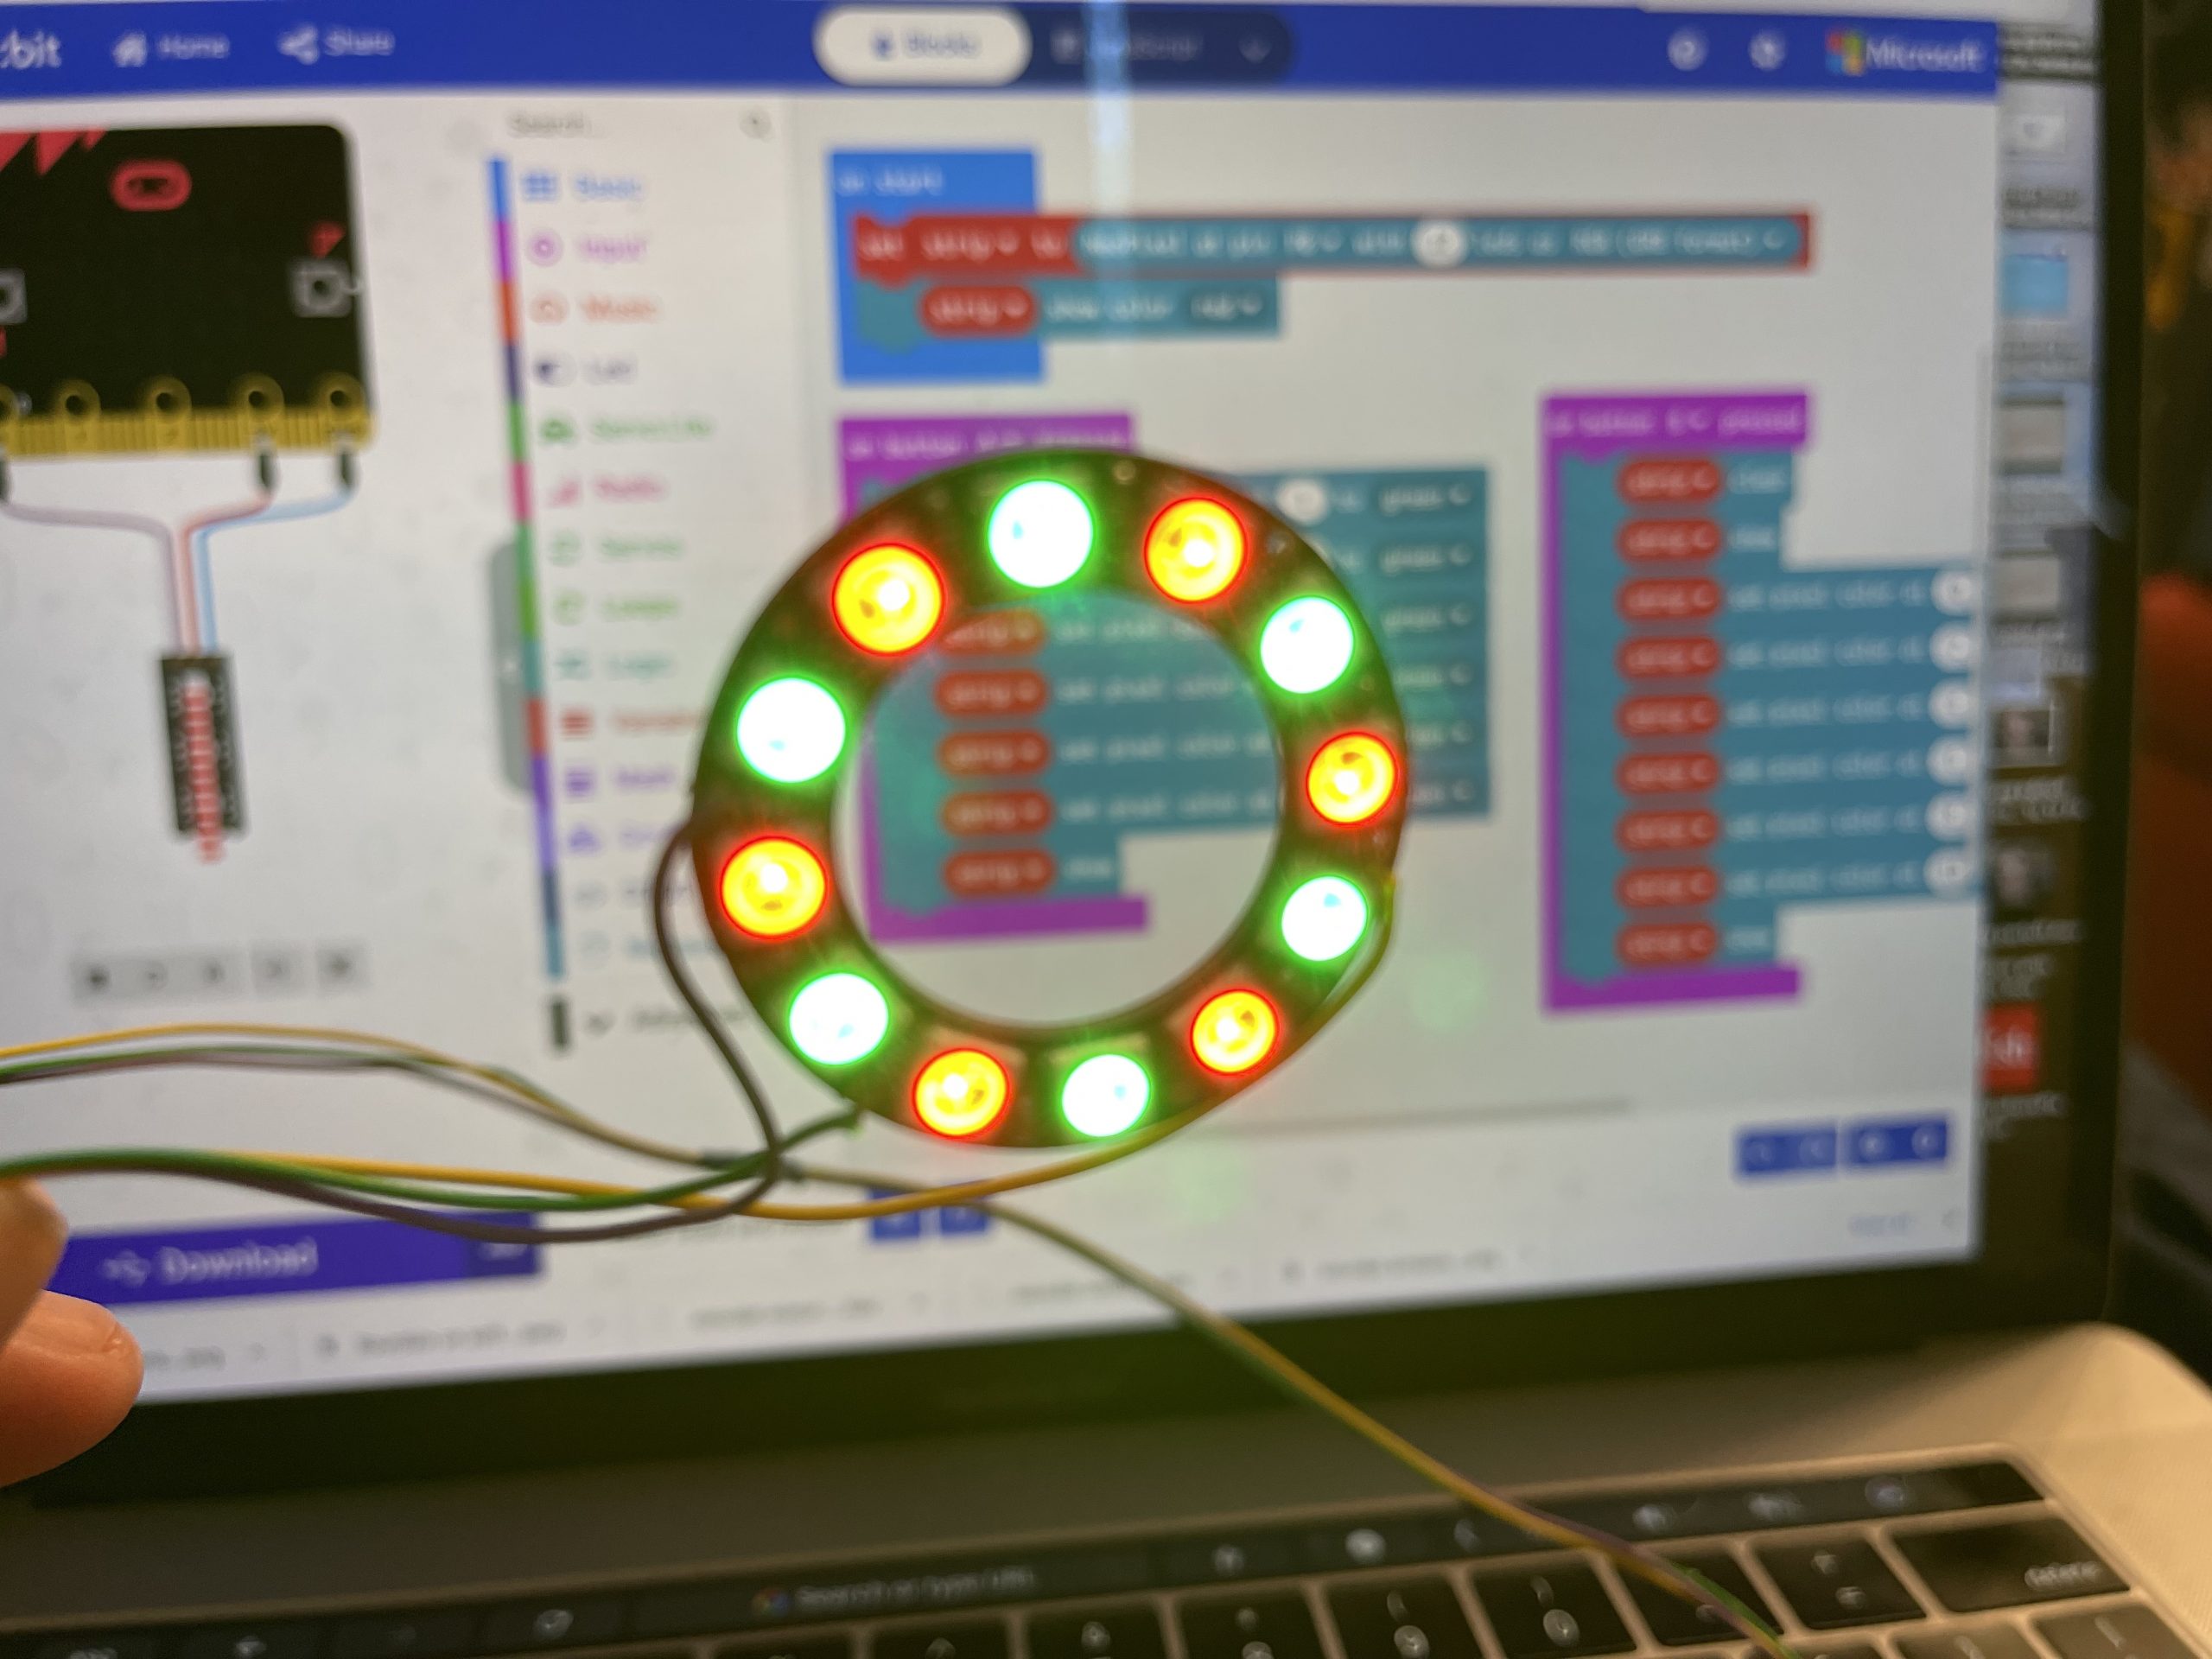
- Press A or B and see what happens.
- Does the code make sense?
Within range
In this program, we want to define a range or region of LEDs in the NeoPixel as a variable in order to change that entire range at once.
We will use the set range block from the NeoPixel blocks in the toolbox. However, we want to set two different ranges of LEDs. So, for the second set range block, we will select the set range block a second time from the NewPixel block palette and MakeCode will add a new set range2 block to the workspace. Do it again and we’ll get range3, etc… In other words, each time you request a set range block, MakeCode automatically creates a new variable.
Set range and its siblings takes two inputs – the LED position where you wish to begin and how many LEDs should be included in that range. For example, if I have a 12 LED NeoPixel that I wish to divide, I might try a program like the following.
What does this program do?
Challenges
- Explore these new NeoPixel blocks in different ways.
- Try new values.
- Can you create numerical light patterns, like odd and even numbers or multiples?
- What can you decorate with NeoPixels?
Be sure to share your MakeCode projects online so others can learn from them!
[1] https://learn.adafruit.com/adafruit-neopixel-uberguide/the-magic-of-neopixels
Veteran educator Gary Stager, Ph.D. is the author of Twenty Things to Do with a Computer – Forward 50, co-author of Invent To Learn — Making, Tinkering, and Engineering in the Classroom, publisher at Constructing Modern Knowledge Press, and the founder of the Constructing Modern Knowledge summer institute. He led professional development in the world’s first 1:1 laptop schools thirty years ago and designed one of the oldest online graduate school programs. Gary is also the curator of The Seymour Papert archives at DailyPapert.com. Learn more about Gary here.